Adding style to HTML using CSS.
Recap
So in our last lesson we learnt how to structure web documents using HTML tags. You should recall that we looked at the following points, which will be important for our lesson today:
- Using HTML to indicate structure of a document
- How to markup using some common block layout elements (div, p etc.)
- The difference between block elements and inline elements.
- How to markup text using inline elements (like span, em and a).
How do styles work in HTML?
The HTML standard gives us a few different ways to add styles to elements. All of these methods use the language 'CSS'.
The term CSS stands for Cascading Style Sheets. Sounds fun right? We'll talk about the cascade a bit later, but it's an important part of CSS.
Seperating form and content
One of the basic principles of coding and programming in general is the idea of seperation of concerns. Seperation of concerns means that each seperate part / module / layer of a computer program should be independent as far as is possible. This means keeping different parts of the program or language seperate, if they deal with seperate functions and things.
To see why this is a good idea, let's make an analogy with a car.
Car 1: The Alpha Car
The Alpha car is made by the Alpha company. It's the only car they manufacture.
They make every part of the car themselves, and each of their parts is specifically designed to work only on this single car model.
In the left door is the left speaker of the stereo, as well as some of the electronics for the entire car audio system. The rest of the electronics are in the right door, and in the dashboard.
Because the electronics are all in the door, and the parts are not very compatible with other cars, we would say the concerns in this car are not separated.
Car 2: The Beta Car
The Beta car is made by the Beta company. They make lots of different cars, but all based on a similar basic chasis and engine.
The electronics for the Beta car audio system are all housed in one location: a box behind the stereo.
We would say in this case, that the concerns (audio system) are seperated from the rest of the car
Scenario :
Some customers want a better audio system for their car. To install this, we need to upgrade the electronics system.
In which scenario is it easier to upgrade the audio electronics?
Alpha car:
Because of the fact that Alpha Company decided to put their audio electronics in the car doors, they now have to remove the doors, door panels on both sides of the car, and maybe even replace or redesign the doors so that the can accommodate the newer and bigger electronics system. This takes time and costs money.
Beta car:
Because all the electronics are in one single location, they can just switch out the old stereo and electronics and slot in a new one.
Which system works best?
As you can see from this silly example, the fact that in Alpha car there was no separation of concerns made it difficult to upgrade and maintain the car.
In the case of Beta car, by separating the concerns, we can increase extensibility and reduce maintenance time and costs.
This is exactly the same as with computer systems. In computer systems we try to apply the principle of Separation of Concerns to ensure that all our components are as independent as possible, to make our code easily updated, upgraded and maintained.
In the case of designing web pages, on a basic level this means we separate out our Structure (HTML) from our Form (CSS) (and also from our interactivity layer - Javascript).
Separation of concerns can actually go much further than just separating our HTML from our CSS. When writing web applications we often also separate our Views (basically everything the user sees, so HTML, CSS and JS) from our Model (the structure of our database) and our Controllers (The code that tells the 'view' what to display). This allows us a lot of flexibility when we want to change or upgrade things.
Don't worry too much about these terms.
Applying Separation of concerns to CSS
Applying separation of concerns to CSS, on it's most basic level, can take the form, for example of having a stylesheet that is separate from our HTML.
We'll see how to do this a bit later.
Some CSS will also use lots of small CSS files, each which deals with the styles of a specific 'concern', like for example a file called layout.css that deals with layout, and typography.css that deals with fonts, etc.
What is CSS ?
CSS is a language similar to HTML, in that it is not a full programming language. CSS gives us the ability to apply some styles to different HTML elements in the browser.
Just like HTML, CSS is interpreted by the browser, and so some browsers will interpret some styles in slightly different ways. This can quickly make it very difficult to code for all browsers (and especially for old ones) and there are some hacks that we have to use to get some things to work on Internet Explorer or Safari (for example).
The website Can I use can be useful as it allows us to look up different CSS properties and see if they are fully supported by different browsers.
Let's take a look at what some CSS looks like:
p {
    font-weight: bold;
}
Each CSS declaration is made up of two parts :
- The selector: The selector in this case is the letter p. This will select all the tags p in our HTML, ie. all the paragraphs.
- The declaration: This is always enclosed in curly brackets
{ }. This is where we state the rules we'd like to apply to the element(s) selected. Within the declaration. Rules always take the formproperty: value;. In this case, the property is font-weight and the value is bold. Take note of the:between the property and the value, and the ';' at the end. These two characters are obligatory. We can have multiple rules for a single element, they can be written on multiple lines (see figure A below) or on a single line (see figure B).
p {
    font-weight: bold;
    color: blue;
    text-decoration: underline;
}
Figure A: CSS declaration with multiple lines.
p {font-weight: bold; color: blue; text-decoration: underline;}Figure B: CSS declaration using the one-line syntax.
Adding some styles
Let's take the example from one of the exercises last week :
<nav>
  <a href="/html/">HTML</a> |
  <a href="/css/">CSS</a> |
  <a href="/js/">JavaScript</a> |
  <a href="/jquery/">jQuery</a>
</nav>

<article>
  <header>
    <h1>What Does WWF Do?</h1>
    <p>WWF's mission:</p>
  </header>
  <p>WWF's mission is to stop the degradation of our planet's natural environment,
  and build a future in which humans live in harmony with nature.</p>
</article>
I'll add the correct head and body structure to make it valid HTML:
<!doctype html>
<html>
  <head>
    <title>WWF Website Example</title>
  </head>
  <body>
    <nav>
      <a href="/html/">HTML</a> |
      <a href="/css/">CSS</a> |
      <a href="/js/">JavaScript</a> |
      <a href="/jquery/">jQuery</a>
    </nav>
    <article>
      <header>
        <h1>What Does WWF Do?</h1>
        <p>WWF's mission:</p>
      </header>
      <p>WWF's mission is to stop the degradation of our planet's natural environment,
      and build a future in which humans live in harmony with nature.</p>
    </article>
  </body>
</html>
When we render this HTML in a web page, it gives us something like the following:
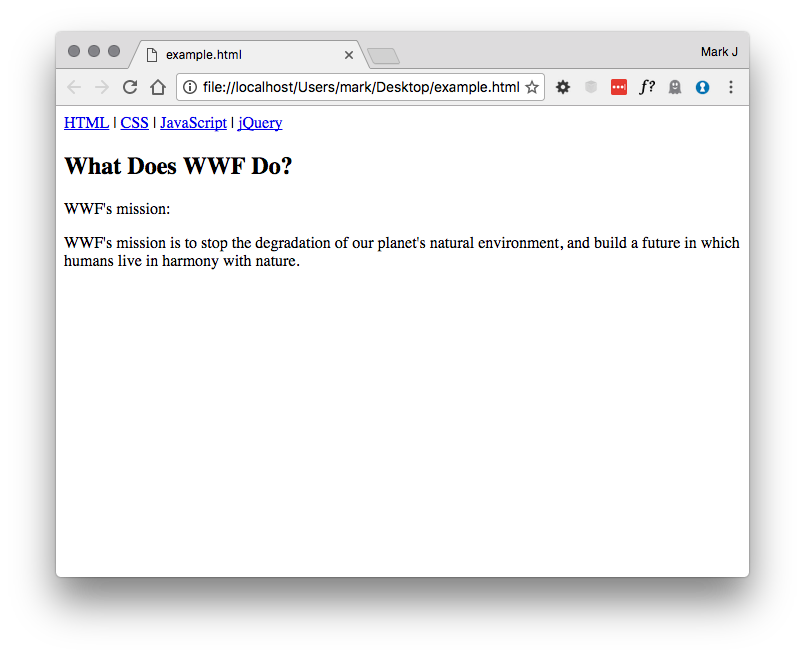
This has defined a nice structure (with a navigation bar, a heading, and some content).
Now let's imagine we want the Links in the header to be bold, to draw our attention to them.
To do that we will use the following CSS rule :
a {
    font-weight: bold;
}
This rule selects all the <a> elements on our page, and makes their text bold.
Including our CSS
There are three ways to include CSS rules in your HTML document.
Option 1: Including CSS in the <head>
Remember the <head> of our document, where we can write meta information about our page? We can also write some CSS styles in here.
We simply need to add a <style> element to the head document, and write our CSS inside.
<!doctype html>
<html>
  <head>
    <title>WWF Website Example</title>
    <style>
      a {
        font-weight: bold;
      }
    </style>
  </head>
  <body>
    <nav>
      <a href="/html/">HTML</a> |
      <a href="/css/">CSS</a> |
      <a href="/js/">JavaScript</a> |
      <a href="/jquery/">jQuery</a>
    </nav>
    <article>
      <header>
        <h1>What Does WWF Do?</h1>
        <p>WWF's mission:</p>
      </header>
      <p>WWF's mission is to stop the degradation of our planet's natural environment,
      and build a future in which humans live in harmony with nature.</p>
    </article>
  </body>
</html>
Have a go at creating this simple document and adding the CSS rule to the header. Refresh the page, and see what happens to the links.
With luck you should have something like this:
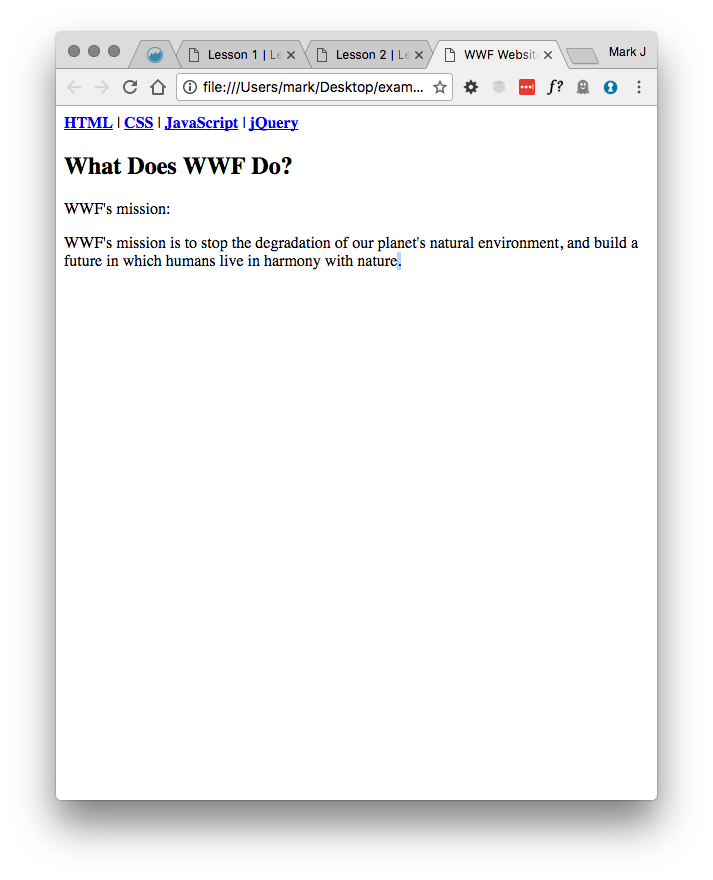
Notice the bold links now in the header?
Great! You just wrote your first CSS.
Option 2: Including a .css file.
We wrote this CSS in the head of our mini website. When a site starts to have hundreds or thousands of pages, it's not really practical to write it in the head.
That's why we usually write our stylesheets separately from our HTML files, and we include them.
Remove your 'CSS' from the head of your web page and insert it into a new text file called style.css. Save this file next to your other .html files (or even in a folder called css if you want to be neat and tidy!).
This file should just contain :
a {
    font-weight: bold;
}
Now, in the head of your document, add the following line of HTML. Be sure to write the correct path of your CSS file in the href attribute.
<link href="css/style.css" rel="stylesheet" type="text/css">A few things are going on here:
- We're telling the HTML to go and find the stylesheet at
css/style.css - We're telling the browser that the relationship is 'stylesheet'
- We're telling the browser that the type of file is text and the language is css.
Save this file, if all is well, you should still see the links in your header in bold. If this isn't the case, make sure your href value is correct for where you placed your CSS file, and that the file is named style.css exactly (be careful of upper and lower case).
You can include as many CSS files as you like in any given project, each just has to be included in this way.
Option 3: Writing inline CSS.
The last option for writing your CSS is a bit different from the rest.
CSS can also be written inline directely inside the HTML elements.
<a href="#">Test link</a>This link has no style. We can make it bold by writing :
<a href="#" style="font-weight: bold;">Test link</a>As you can see, we don't need a selector here (as only the element we're writing in is concerned) and we use the same syntax as in the CSS file just without the curly brackets.
This way of writing CSS is mostly used when working with Javascript and other elements that dynamically change the elements on the page.
For the rest of the exercises I'll assume you're using the second method, ie. writing the CSS in a seperate file. This is by far the most common and is considered a best practice (because of the 'Seperating concerns' rule - do you see now what that was all about?).
Selectors
When we write CSS then, the first thing we need to do is to select the element to which we want to apply a style.
Selecting Tags
We can select all the elements of a given 'tag' by simply writing the tag name on a new line in our CSS:
p {
    color: black;
}
This will select all the paragraphs in the entire page.
div {
    font-style: italic;
}
This will select all the divs in the entire page.
...and so on.
Take one of your HTML documents from the exercises last week. Can you select and apply the style color: red; to :
- All the links
- All the paragraphs
- All the 'strong' emphasis text (tag
<strong>) - All the h2 headings.
Classes
However, often we don't want to select all the given elements in the page. In these cases we can use a nice little feature of HTML called classes.
Classes are types or 'classes' of elements that you define on your page. You can then use a CSS selector to select a whole class, thereby only selecting the elements you want to, to apply your style.
You can add a 'class' attribute to any HTML element in the page.
Take a look at the code below:
<h2>Lorem Ipsum</h2>

<p class="chapo">Lorem ipsum dolor sit amet, consectetur adipisicing elit,
tempor incididunt ut labore et dolore magna aliqua. Ut enim ad minim veniam,
quis nostrud exercitation ullamco laboris nisi ut aliquip ex ea commodo
consequat. Duis aute irure dolor in reprehenderit in voluptate velit esse
cillum dolore eu fugiat nulla pariatur. Excepteur sint occaecat cupidatat non
proident, sunt in culpa qui officia deserunt mollit anim id est laborum.</p>

<p>Lorem ipsum dolor sit amet, consectetur adipisicing elit, sed do eiusmod
tempor incididunt ut labore et dolore magna aliqua. Ut enim ad minim veniam,
quis nostrud exercitation ullamco laboris nisi ut aliquip ex ea commodo
consequat. </p>

<p>Duis aute irure dolor in reprehenderit in voluptate velit esse
cillum dolore eu fugiat nulla pariatur. Excepteur sint occaecat cupidatat non
proident, sunt in culpa qui officia deserunt mollit anim id est laborum.</p>
And its CSS :
p {
    font-size: 10px;
    color: grey;
}
.chapo {
    font-size: 12px;
    color: black;
}
What do you think the result would be of this CSS?
Using classes in this way, we can target specific elements or sets of elements in the page, and apply styles just to them, ignoring the other elements of the same type.
Specifying a class in CSS is done by writing the selector as .class-name with a period / full stop at the begining of the class name.
Take one of your previous exercises and, by using classes, try making:
- Just two paragraphs from your text the
color: red;. - Just one heading underlined
- 3 different spans bold.
If you need some help for the rule for 'underline' and 'bold' take a look at the CSS documentation. Hint for the 2nd task you'll need the
text-decorationproperty.
IDs
The final way we'll look at of selecting an element in CSS is using another attribute, similar to 'Class'. IDs work in the exact same way as classes, with one important difference : You should never have two elements with the same ID in the same page.
Take a look at the code below:
<h1 id="page-title">Lorem Ipsum is the single greatest threat.
We are not - we are not keeping up with other websites.</h1>

<p class="chapo">You have so many different things
placeholder text has to be able to do, and
I don't believe Lorem Ipsum has the stamina.</p>

<p>I think the only card she has is the Lorem card. Does
everybody know that pig named Lorem Ipsum? She's a
disgusting pig, right? My text is long and beautiful,
as, it has been well documented, are various other parts
of my website. My placeholder text, I think, is going to
end up being very good with women.</p>
To select the element with the ID page-title in CSS we simply do the following:
#page-title {
    color: blue;
}
We use the # symbol in CSS to indicate that the declaration is an ID.
When chosing your IDs and CSS classes, we usually tend to use something descriptive. There are two schools of thought in Front-End design, but recently the 'semantic' school has been winning. They say that your classes and IDs should be decriptive of the role and function of the element. So you should use something like page-title rather than big-blue-title which is not descriptive of the function, but rather the form.
Note as well that you can't use spaces in IDs or in classes. The common best practice is simply to use all lowercase text, and replace spaces with - or _. The choice is up to you, but try to be consistent in your projects.
In general, nowadays a lot of people will tell you that you shouldn't use IDs in CSS, but stick to classes, as you can have problems with the cascade (we will see later what we mean). In general this is a good rule to follow (use classes for everything) but again... all rules are made to be broken! So just use your head, if it seems appropriate use an ID rather than a class, but otherwise stick to classes.
Selecting multiple elements
Imagine we want to change the color of all our links, and also all our titles, to red.
We can write in CSS :
a {
    color: red;
}
h1 {
    color: red;
}
h2 {
    color: red;
}
h3 {
    color: red;
}
h4 {
    color: red;
}
h5 {
    color: red;
}
h6 {
    color: red;
}
But, in programming we always try to write DRY code. DRY stands for 'Don't Repeat Yourself'. This little saying reminds us to try to be as efficient as possible in our code and never to repeat the same code lots of times when we could simplify it.
In this case, CSS helps us simplify our code, because we can list a whole bunch of selectors, separated by the , and then apply the rule just once to all of them:
a, h1, h2, h3, h4, h5, h6 {
    color:  red;
}
These two code blocks are strictly the same, but the second one saves us quite a bit of repeating ourselves.
We can of course do this with classes and IDs as well:
a, #page-title, .chapo {
    color:  red;
}
Combining selectors
This is where CSS becomes a lot more powerful. There are a certain number of ways of combining selectors to select specific elements, without needing to give them specific classes.
Selecting children
Consider the following HTML :
<a href="home.html">Home</a>
<article>
    I will write some great placeholder text – and nobody writes better
    placeholder text than me, <a href="believe.html">believe me</a> – and I’ll write it very inexpensively.
    I will write some great, great text on your website’s Southern border,
    and I will make Google pay for that text. <a href="mark.html">Mark my words</a>.
</article>
Imagine we want to:
- Make all links in the page bold and red.
- Remove the underline from links in the
article.
We can do this easily with the following CSS :
a {
    font-weight: bold;
    color: red;
}
article a {
    text-decoration: none;
}
What exactly is happening here?
When we chain CSS selectors with a space between them, they are interpreted as children. This CSS indicates we want to remove the underline from all a tags that are children of article tags.
They don't even had to be direct children, if we put them as below, the rule will still be applied, as the CSS 'space' chaining selector doesn't care how many other elements are between the child and parent :
<a href="home.html">Home</a>
<article>
    I will write some great placeholder text – and nobody writes better
    placeholder text than me, <a href="believe.html">believe me</a> – and I’ll write it very inexpensively.
    I will write some great, great text on your website’s Southern border,
    and I will make Google pay for that text. <a href="mark.html">Mark my words</a>.

    <ul>
        <li><a href="#">I am still not underlined</a></li>
        <li><a href="#">I am still not underlined</a></li>
    </ul>
</article>

<a href="#">I am underlined because I am not within an article tag.</a>
Try this out yourself in a new HTML file !
Selecting Direct Children
Let's keep the HTML from our text above.
<a href="home.html">Home</a>
<article>
    I will write some great placeholder text – and nobody writes better
    placeholder text than me, <a href="believe.html">believe me</a> – and I’ll write it very inexpensively.
    I will write some great, great text on your website’s Southern border,
    and I will make Google pay for that text. <a href="mark.html">Mark my words</a>.

    <ul>
        <li><a href="#">I am still not underlined</a></li>
        <li><a href="#">I am still not underlined</a></li>
    </ul>
</article>

<a href="#">I am underlined because I am not within an article tag.</a>
Imagine we want to select only the links within the article tag, but not the links in the li elements. This is made easy with CSS as we can select elements that are direct descendents of other elements :
article > a {
    color: hotpink;
}
This rule will simply make all the links directly in the text pink, but won't touch the other links inside the li elements. This is because the > chaining symbol in CSS indicates that we only want to match a elements that are direct descendants of article elements, and not ones that are children but inside other elements inside the article.
Try this out yourself as well !
Chaining selectors
Another thing you might encoutner in CSS is multiple selectors pointing at the same element in the same line:
h1.title a#page-link {
    color: red;
}
What this means is "All a tags that have the ID page-link that are inside h1 elements that have the class title."
Advanced selectors
These two selectors are the basic ones you'll use the most often. But there are lots of advanced selectors. Below is a non-exhaustive list, and you can take a look at the following website for a more comprehensive look at Advanced selectors.
*selects every element: e.g.p > *- all elements directly inside ap.:first-childselects elements which are first-children (ie. the first element within a parent):last-child- as above except last children.:hover- selects elements when mouse is hovering over them (for applying hover effects)[attr=val]selects elements with attribute 'attr' and value 'val'. e.ginput[type=email]selects elements that match<input type="email">.+- selects siblings (e.g.p + aselects allatags directly preceded byptags)
For more and to learn a bit about advanced selectors, check out :
- http://learn.shayhowe.com/advanced-html-css/complex-selectors/
- https://code.tutsplus.com/tutorials/the-30-css-selectors-you-must-memorize--net-16048
Using span and div to select in CSS
Do you remember in the HTML class we talked about <span> and <div> tags, that they would become clear when we talked about CSS?
Well let's imagine we want to define a block in a layout (for example, we have a layout in 2 columns, and we want to select the left column)/
In our HTML, there is no tag <column> (it doesn't exist), and we don't have any other 'structural' element to use at this point. We can use <div class="left-column">. This has the advantage of :
- Creating a block of content
- Applying a class so we can select it with CSS
divandspandon't apply any inherent formatting. They simply allow us to select things with CSS.
<div class="left-column">
    I'm speaking with myself, number one, because I have
    a very good brain and I've said a lot of things. I'm
    speaking with myself, number one, because I have a
    very good brain and I've said a lot of things. I have
    a 10 year old son. He has words. He is so good with
    these words it's unbelievable. I'm speaking with myself,
    number one, because I have a very good brain and
    I've said a lot of things. I have a 10 year old son.
    He has words. He is so good with these words it's
    unbelievable. If Trump Ipsum weren’t my own words,
    perhaps I’d be dating it.
</div>
<div class="right-column">
    I'm speaking with myself, number one, because I have
    a very good brain and I've said a lot of things. I'm
    speaking with myself, number one, because I have a
    very good brain and I've said a lot of things. I have
    a 10 year old son. He has words. He is so good with
    these words it's unbelievable. I'm speaking with myself,
    number one, because I have a very good brain and
    I've said a lot of things. I have a 10 year old son.
    He has words. He is so good with these words it's
    unbelievable. If Trump Ipsum weren’t my own words,
    perhaps I’d be dating it.
</div>
And here's the CSS
.left-column {
    /* CSS goes here */
 }
.right-column {
    /* CSS goes here */
}
That little line /* CSS goes here */ is called a comment! In CSS comments always start with /* and end with */. Whatever you put within those two delimiters, even accross multiple lines, will be completely ignored by the browser.
We can write comments in many languages - in HTML they look like this :
<!-- this is a comment -->Comments can be useful when you want to write a little reminder in your code, for yourself, for your future self (when you have to come back to your code in a year and you can't remember what it did!), or for colleagues who might have to work on your code. Comments allow you explain what your code does.
You can also use comments to temporarily disable elements, whilst testing things, but wrapping them in comments like below :
.left-column {
    /* color:red; */
}
Using Span to select inline
Span performs the exact same task as div except, as we've already seen, span is an inline element. So you can apply span to different text that you want to select and apply a special formatting to, without giving any other formatting:
<p>
    <span class="first-line">I'm speaking with myself</span>, number one, because I have
    a very good brain and I've said a lot of things. I'm
    speaking with myself, number one, because I have a
    very good brain and I've said a lot of things. I have
    a 10 year old son. He has words. He is so good with
    these words it's unbelievable. I'm speaking with myself,
    number one, because I have a very good brain and
    I've said a lot of things. I have a 10 year old son.
    He has words. He is so good with these words it's
    unbelievable. If Trump Ipsum weren’t my own words,
    perhaps I’d be dating it.
</p>
And the CSS :
p .first-line {
    font-size: 14px;
}
Exercise
Ungraded Exercise : Selectors Quiz
This is an ungraded exercise for practice only, you don't need to submit it for grading
Copy the HTML code below into a new HTML document. There might be some tags that you don't recognise but it doesn't matter too much.
<!DOCTYPE html>
<html>
<head>
<meta charset="utf-8">
<title>Girl Develop It</title>
</head>
<body>
<h1>About</h1>
<p>It can be intimidating for women to learn and ask questions when they are in an <strong>extreme minority</strong>. While open and welcoming, today's budding developer community is up to <strong>91% male</strong>. If we can empower more females with the confidence in their technological capabilities <em>we can begin to change this landscape</em>.
</p>
<h2>Our Locations</h2>
<ul>
<li>USA
<ul>
<li><a href="#">New York</a></li>
<li><a href="#">Columbus</a></li>
<li><a href="#">Austin</a></li>
<li><a href="#">Philly</a></li>
</ul>
</li>
<li>World
<ul>
<li><a href="#">Ottawa</a></li>
<li><a href="#">Sydney</a></li>
</ul>
</li>
</ul>
<h2>Upcoming Classes</h2>
<table border="1">
<thead>
<tr>
<th>Location</th>
<th>Topic</th>
</tr>
</thead>
<tbody>
<tr>
<td>New York</td>
<td>JavaScript & jQuery</td>
</tr>
<tr>
<td>San Francisco</td>
<td>HTML & CSS</td>
</tr>
</tbody>
</table>
<h2>Sign Up!</h2>
<form method="post">
<label>Name: <input name="name" type="text"></label>
<br>
<label>Email: <input name="email" type="email"></label>
<br>
<label>Location:
<select name="location">
<option value="sf">San Francisco</option>
<option value="nyc">New York</option>
</select></label>
<br>
<fieldset>
<legend>Gender:</legend>
<label for="female">Female</label>
<input type="radio" name="gender" id="female" value="female">
<label for="male">Male</label>
<input type="radio" name="gender" id="male" value="male">
</fieldset>
<br>
<label>Experience:
<br>
<textarea name="experience"></textarea>
</label>
<br>
<button type="submit">Sign Up</button>
</form>
<br><br>
</body>
</html>Now save this as an HTML document, create a CSS file next to it, and link to two with the <link> tag in the head of your HTML.
Using the selectors you learnt, and by adding classes / IDs to the HTML where appropriate, render the following output in the browser :
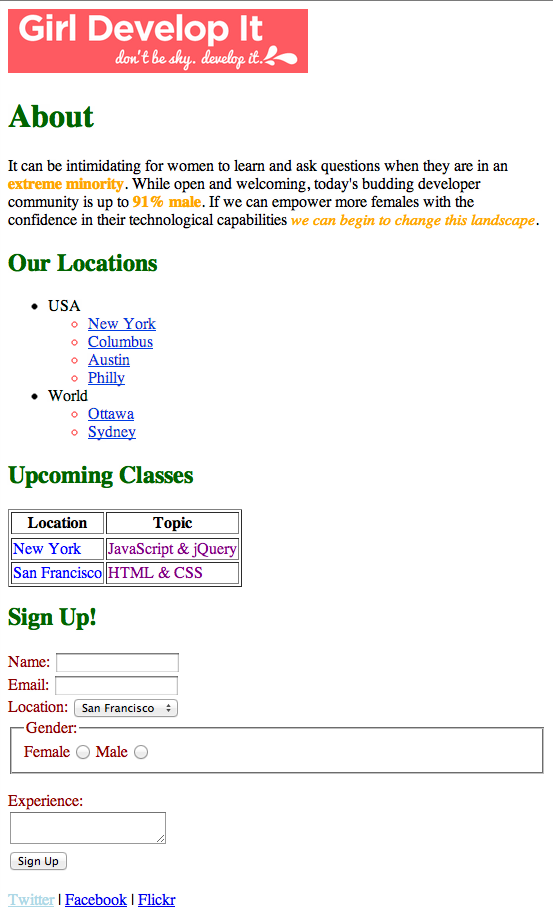
You should use the CSS rule : color: and the values : red, blue, green, yellow, purple, orange, darkred, lightblue depending on the color you're aiming for.
There's one tricky bit we haven't seen yet (the bullet points!). See if you can find out online how to do it!